We've been trying to figure out when we were going to renovate the kitchen and finish up the pantry, the largest renovations we've attempted in the apartment so far. Luckily, on the spur of the moment, I was able to take a few weeks off from work to really push hard on the kitchen. Caroline still has research, but I'm able to throw myself at the project 100%. We'll be updating the blog more often as there should be a lot more work completed over the next several weeks.
We've gone back and forth about the pantry and had been thinking for the last year or so that we were going to put the washer and dryer in the basement, creating a little laundry area of sorts. This would leave our pantry as it is currently, a huge uninterrupted expanse of shelving. The laundry area downstairs would have a decent floor, be clean, and I was going to make it "Caroline Approved". However, as the day to start the pantry renovation drew nearer, we realized that we really liked having the washer and dryer in the apartment. It means you don't have to put shoes on to take it down there, the dirty (or clean) clothes can sit out in a hamper, and it just generally feels like less of a trek to do laundry (even though it would have been a whole 15 steps).

So, we decided to put the washer and dryer in our pantry. We junked the set we bought from the previous tenant (more like a gift for a mandatory donation towards her moving fund) and bought ourselves a front loading high efficiency set off craigslist. The best part of it is that I can see the clothes cleaning now! I'm mesmerized by the clothes tumbling one direction, then back again, then water, then more tumbling..... Caroline finds this hilarious.
With the layout set, we tore in to the pantry, removing all of the old shelving as well as a little cabinet. The floor (tile) also came up. It didn't take long, but it left us with some pretty nasty holes in the wall where the shelves were. We decided not to take down the plaster walls, because other than where the shelves were they were in decent shape. So we used our standard approach to repairing plaster walls: (1) screw in the parts that are "ponky", (2) fill screw holes and holes where the plaster was loose with lots of spackle, (3) put a skim coat of spackle on areas of the wall that aren't super smooth, (4) sand, primer, and paint.


It was a large spackle job and required about four coats. The holes were down to the lath, with some chunks missing up to 2" square. The joint compound shrinks and won't dry right if you put it on too thick, so many coats are required. I used to try to make it as close as possible to "finished surface" while applying the compound, but I've learned that it is a heck of a lot faster to do 80% of the quality in 20% of the time and then sand it down. I normally use a small sanding block, but this time I broke down and bought a REAL drywall sander!
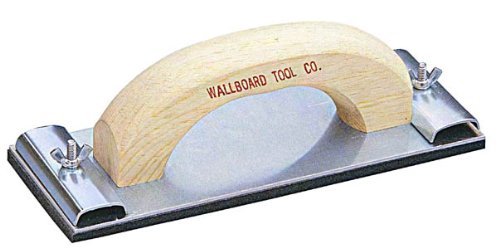
It is larger (9" long) and is MUCH easier to create a flat surface with. The foam helps smooth over slight transitions, but it is large enough such that it works almost entirely on the high spots. In addition, it takes off the compound REALLY fast! I highly recommend spending the $8 on this tool, as it made the sanding process a lot easier.
Finding a color was, in classic David and Caroline fashion, difficult. We tried 7 samples before deciding on "indulgent mocha", which was almost identical to the color the pantry was previously painted. Go figure. Either way, the ceiling, molding, and wainscoting are now white (cotton fluff) which looks much better.


We've gone back and forth about the pantry and had been thinking for the last year or so that we were going to put the washer and dryer in the basement, creating a little laundry area of sorts. This would leave our pantry as it is currently, a huge uninterrupted expanse of shelving. The laundry area downstairs would have a decent floor, be clean, and I was going to make it "Caroline Approved". However, as the day to start the pantry renovation drew nearer, we realized that we really liked having the washer and dryer in the apartment. It means you don't have to put shoes on to take it down there, the dirty (or clean) clothes can sit out in a hamper, and it just generally feels like less of a trek to do laundry (even though it would have been a whole 15 steps).

So, we decided to put the washer and dryer in our pantry. We junked the set we bought from the previous tenant (more like a gift for a mandatory donation towards her moving fund) and bought ourselves a front loading high efficiency set off craigslist. The best part of it is that I can see the clothes cleaning now! I'm mesmerized by the clothes tumbling one direction, then back again, then water, then more tumbling..... Caroline finds this hilarious.
With the layout set, we tore in to the pantry, removing all of the old shelving as well as a little cabinet. The floor (tile) also came up. It didn't take long, but it left us with some pretty nasty holes in the wall where the shelves were. We decided not to take down the plaster walls, because other than where the shelves were they were in decent shape. So we used our standard approach to repairing plaster walls: (1) screw in the parts that are "ponky", (2) fill screw holes and holes where the plaster was loose with lots of spackle, (3) put a skim coat of spackle on areas of the wall that aren't super smooth, (4) sand, primer, and paint.


It was a large spackle job and required about four coats. The holes were down to the lath, with some chunks missing up to 2" square. The joint compound shrinks and won't dry right if you put it on too thick, so many coats are required. I used to try to make it as close as possible to "finished surface" while applying the compound, but I've learned that it is a heck of a lot faster to do 80% of the quality in 20% of the time and then sand it down. I normally use a small sanding block, but this time I broke down and bought a REAL drywall sander!
It is larger (9" long) and is MUCH easier to create a flat surface with. The foam helps smooth over slight transitions, but it is large enough such that it works almost entirely on the high spots. In addition, it takes off the compound REALLY fast! I highly recommend spending the $8 on this tool, as it made the sanding process a lot easier.
Finding a color was, in classic David and Caroline fashion, difficult. We tried 7 samples before deciding on "indulgent mocha", which was almost identical to the color the pantry was previously painted. Go figure. Either way, the ceiling, molding, and wainscoting are now white (cotton fluff) which looks much better.

You'll notice that there is a large gap where the molding was missing from the above the wainscoting. I'll fix that later!
We decided on tile for the pantry (now a laundry room) and kitchen, and after actually reading the directions for my backer board found out that I needed to put mortar under the board, something I didn't do in the bathroom. It isn't the end of the world if you don't do it, but there is a higher potential for a cracked tile if your floor is "bouncy". The mortar between the underlayment and the floorboards smooths out any imperfections and supports the cement board for a floor with no deflection.


We went with epoxy grout because it was highly recommended for stain resistance, something we had heard from coworkers was a problem in kitchens. It doesn't require sealing (good), but has a very short working window. I managed to work quickly and finish it before the grout set. This picture also shows the baseboard and trim I put to cover up the hole above the wainscoting. I used my new(ish) table saw to cut out a .5x.75" notch the length of the board which allows it to slide over the top of the vertical boards. It worked well, although Caroline still says that we'll "need to hide it behind a shelf"!
Last came plumbing!

And the finished product! It looks like we'll need a stool for Caroline.

We are really happy with the "finished" look of the room, though we have yet to install shelving and/or cabinetry.
No comments:
Post a Comment