Friday, May 31, 2013

A beautiful patio just in time for summer!

We have finally finished the big tasks for our patio! David (and his dad for part of it) laid the majority of the patio blocks last summer and fall, and it wasn't until this spring that David and I planted the grass and flowers that we had in mind to finish the space. The patio blocks are from Home Depot, and they were laid on top of several inches of graded gravel. Blocks that needed to be cut were cut with a concrete saw borrowed from my grandfather. At the end, David brushed stone dust into the cracks - we chose this as it was recommended to be the best at preventing weed growth. 

We still have a few things in the plans... like painting or staining the fence, perhaps putting in a different fence all together, and building a picnic table (with detached benches) to replace the current patio furniture on loan from Tommy. Even without the finishing touches, the patio looks AWESOME! I am so excited to have dinner out there this summer, and perhaps even sit out there working during the day. David also plans to change the gate to our backyard soon so that the entire space behind the house is secure, allowing us to walk right out the back door with the dogs off leash! They can then run around the whole yard and patio area while we are out there. 

To fully appreciate the above photo, you have to remember what the area looked like when we started. You can read the full blog post about when we started taking apart the back yard to build the garage by clicking here

There was a falling down metal shed in the back corner, and a weed ridden chain link fence along the back property line. We took out the fence to build the garage as close to the property line as possible, and took down the useless shed. We also obvious pulled off and discarded all of the unwanted foliage. 

The house actually had a really nice back deck when we moved in, and I was sad to see it go. However, it was too large to accommodate the oversized garage we had planned for. We saved all of the wood from the deck, and reused as much as possible. What we couldn't find a use for Harvie took home to Vermont. 

A view from the second (or third?) floor. This is with the bulk of the plant life removed, and the shed and deck pieces organized. You'll notice that entire backyard space was paved when we purchased the house. 

 Here's the "now" picture again. Beautiful! We obviously sacrificed "outdoor space" for the garage, but we did our best to find a happy medium that would still give David the work space he was looking for in his playhouse :) 

A view from another angle. We'd eventually like to purchase a larger gas grill. We've really enjoyed our small charcoal grills, but they aren't quite sufficient for entertaining guests and the extra time involved with heating the coals is just enough of a nuisance that we don't grill out as much as we'd like to. Charcoal will always taste better though! 

 The grass is still growing in, but its looking very healthy and lush. We may eventually open up the angled fence piece here to the rest of the yard, or replace it with either a smaller fence piece or a large bush. It offers very welcomed privacy to the busy street we live on, but it also makes the space feel smaller and doesn't create as direct of a path (or line of sight) for the dogs (or future kids) to play in.


We spent quite some time at a local garden center last weekend picking out plants that we liked the looks of, that were appropriate for the sun level in our garden, and that would grow to a high enough height to fill int he space some. David did the planting while I followed behind with the cedar mulch. 


We continued the patio blocks to the edge of the house on the driveway side. The back stairs were made by Harvie and David using the leftover stairs, railings, and wood pieces from the deck! This is the area that David will fence off (right at the edge of the house, behind the steps) so that the dogs will have a larger area to run free in. It will also be safer because the area will be fully enclosed when they exist the back door. Currently we take them to the yard on leash, and only let them loose after locking the gate behind us. 


In addition to working on the back yard, we worked some on the side/front yard as well. Last year for my birthday David's parents and his grandparents teamed up to give me planters (with plants if desired) to start landscaping along the edge of the house. They weren't sure what I wanted or what would work best for the space, so the gift existed in concept only for a long time while I decided what I would like there. A whole year has since passed, and another birthday is upon us! They decided to join forces again and combine two birthdays into one gift (still with two givers), so I picked out two large (and very pretty!) wooden planter boxes and one clay pot - all three filled with herbs for the summer. They are exactly what I had in mind! Ultimately we would like to remove the gray stucco from the house to expose the original red brick behind it, and continue the planters along the longer side of the house as well. We aren't quite ready to do that yet though, and didn't want to buy any more planters until we were able to evaluate how these looked and how they held up over time.


In one planter I planted rosemary, oregano, and parsley.


In the middle pot I planted mint - this received a pot of its own at the recommendation of the garden center. Apparently mint has a tendency to take over things and grow very large. Yum! I'm thinking... mint iced tea?


In the second planter I planted six basil plants. Maybe I'll grow enough for a small batch of pesto!


Many thanks to Harvie, Susan, Gpa Jim and Gma Netta! This was a perfect gift and I have a smile on my face very time I see the outside of the house now :) And I'm looking forward to using the herbs!

Here is a picture of my new planters from the front of the house. You'll notice that we also bought a hanging plant to spiff up the porch a bit. Everything is looking so clean and tidy! We repainted the porch and steps last spring, and have spent two summers working to improve the quality of grass in our side yard. We are also regularly pruning the bush out front too, so our front porch is no longer hidden by a green beast.


A close up of the front porch. Next on my list is to paint both the front doors and the screen doors. I haven't decided on color yet... but I'm leaning towards brick red for one and white for the other. Does anyone have any suggestions?? I was thinking brick red to match the brick we plan to expose along the foundation. I have seen other screen doors painted on neighboring streets, and it looks quite nice actually and might make the doors look a little bit more upscale than they do now. I think a white door would be much brighter for the main door (it's currently a very dark wood), and would look nice from inside the house as well. 


Finally... some cute doggies excited that there are plants to water at least once daily so they get more time to run in the yard!


Saturday, May 25, 2013

24 Hours of Lemons, round 3

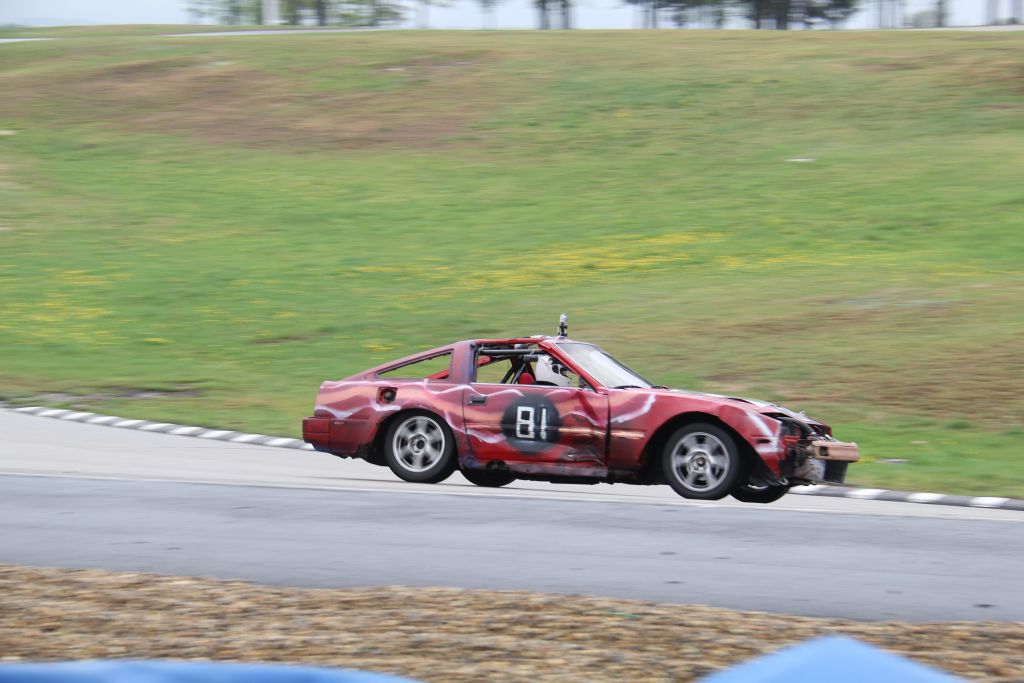
After a two year hiatus, Eric Gemme and I decided to attempt to get our 24 Hours of Lemons car back in to running order. 24 Hours Of Lemons (a play on the 24 hours of Le Mans, a famous endurance race) is a race where you are only allowed to spend $500 on your car...total. This excludes safety equipment (roll cage, harness), but everything else counts towards the value of the car. Our previous two attempts didn't go very well: 2010 it took us 30 minutes until we blew the engine, and 2011 we got ~5 hours run time due to problems and black flags. Even so, our 1986 Nissa 300zx made it to take the checkered in 2011, a significant milestone for us.
2010 LeMons - the best the car ever looked

The 2011 24 Hours of Lemons Team.
From Left: David, Eric, Dan, Ryan, and Greg
Two years later, Eric and I decided to make another attempt with two new team members, Rob and Rob Greig. Yes, they are cousins named Rob Greig. They quickly became "Senior" and "Junior".

The resurrection was potentially going to be a large undertaking, as our car didn't run incredibly well two years ago when we put it......in a field....and forgot to put antifreeze in it (instead of water). We knew that the water had frozen the first winter, but we didn't know how badly it had hurt the block (you can easily crack the engine block, ruining it, by letting water freeze in it). We towed the car to my garage, put it on the lift (so. awesome.) and started to check out the damage. Turns out that the aptly named "freeze plugs" had saved us! One had popped out, emptied the engine of water, and saved us! We replaced the plug, filled it up, and the car held coolant. We removed all of the emissions equipment at the same time, hoping it would help with the idle (it previously didn't).

When we buttoned everything back up it took some coaxing to start, but it started! As the engine warmed up (this was the middle of winter) it ran better and better, to the point that it seemed....normal! We rejoiced.

Wanting to make sure the car was more reliable, we replaced the rear axles, secured the gas tank, replaced the rear brake line, replaced the gas filler line, replaced the front struts, built a duct for the radiator, and generally cleaned the car up. Having tested compression and found it was low in three cylinders, we even bought a new engine as a replacement.


May 10th we headed out to the race! (Trailer thanks to Caroline's Grandpa John)


Our car had a "Bacon" theme to it (all cars are required to have a theme). If you squint, you can kind of see it.


At the race, the first day (practice) went....almost too well! Everyone got race time and we felt pretty good about the car.


Race day came and so did the rain. After lining up, Eric took the first stint. He drove very well and managed to get no black flags (our #1 goal)!


However, out black flag luck ended there. Rob Sr. got a black flag, I got a black flag, and Rob Jr. got a black flag, all for relatively minor infractions. Five black flags and we basically have to stop for the day. We "toned it down" and managed to only get two more black flags for the rest of the day, one of which we were able to "buy off" by donating to charity.

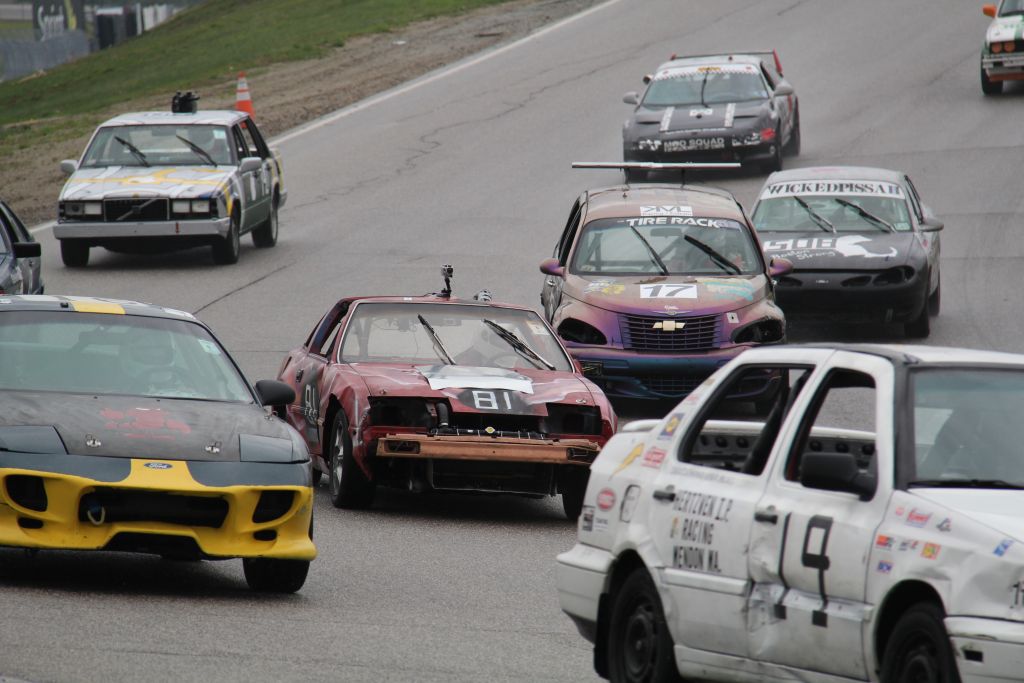
Just before the end of the first day our clutch disintegrated. We managed to find parts, get the car up, and replace all of it. We also replaced our rear differential with a limited slip one (we had lots of inside wheel spin). We managed to get a whopping 3 hours of sleep after finishing everything. All in all, we only missed and hour and 20 minutes of race time due to the problem! Unfortunately I didn't get a picture of this. I did find a decent picture of us in full race mode (including a bashed in door) from a race gallery:


You can see more pictures of the race here: http://www.murileemartin.com/UG/LNHS13/LNHS13.html

After two days of racing, we had completed the most number of laps ever for our team. We had the clutch problem, and a leaky radiator (another lost hour), but we ended up driving for most of the 14.5 hour long race, a huge win for us. Finishing 50th (out of 87) wasn't awesome, but it wasn't too shabby either. We'll be racing again in August and September, so look for more updates then!

Race footage from the car:


Data Analysis - Coming soon!

Friday, May 17, 2013

Caroline hasn't killed the african violets yet!

Back in October I wrote a post about my African Violet ICU. I have killed a number of African Violets in my lifetime, and this last time I was so discouraged I called my grandmother and asked her how I could salvage the plant. She suggested rooting the leaves, and so I did! I wasn't exactly sure what to expect, but it seems to have worked well - I have new leaves sprouting!

My planted leaves in October, after letting them them root in water for awhile. 


Here is how I rooted the leaves (keep in mind I am NOT an expert gardener):

1. Cut a few big healthy leaves off of the dead/dying plant (this could be done with a healthy plant too, I just don't have too many of those around). Be sure to cut the stem at an angle for maximum exposure.

2. Place the cut leaf in a small dish of water (I used a ramekin) and put in the sun. Be sure the leaf isn't in the water itself, just the stem - you can use something like wax paper with a slit in it to help keep the leaf upright. Change water occasionally, and wait. Eventually you will see roots start to extend from the leaf!

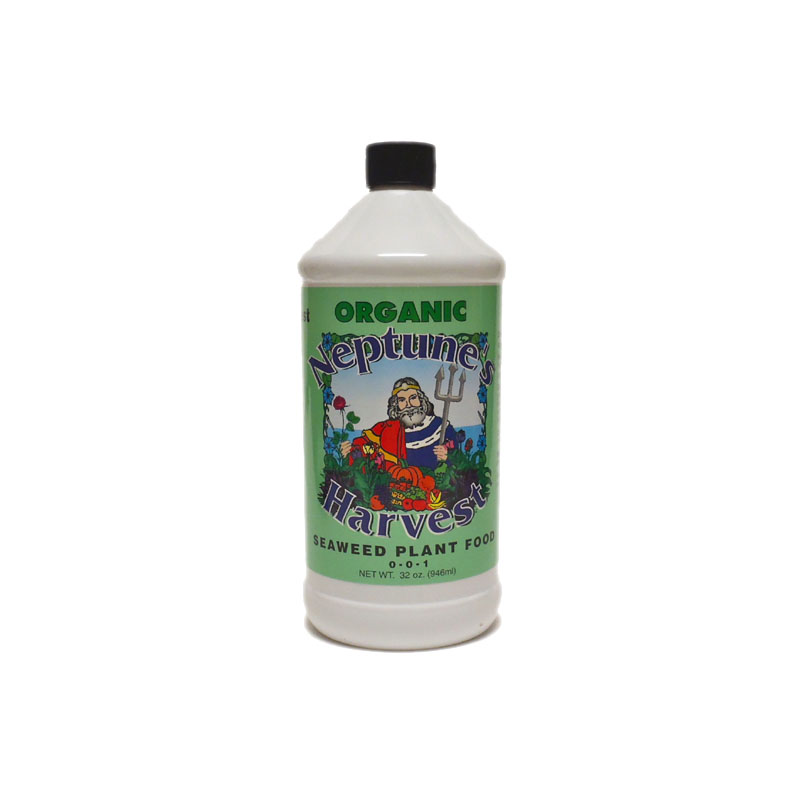
3. Keep waiting. When there are a lot of roots coming from the stem, plant in small pots using African Violet Potting soil. Keep in the sunlight and water daily. I also used Neptune Harvest Organic Seaweed Fertilizer occasionally, at my grandmother's recommendation. The bottle says to fertilize them every 2-3 weeks. To be fully honest, I think I only used this every 2-3 months. Luckily the plants are still alive!

5. Be patient, keep waiting. This whole process literally took 8 months for me, and I still don't have a full plant! Once your newly sprouted leaves have created a bit of a cluster (more like a normal plant) and look they they are outgrowing their pot, repot into a larger pot. I just did this today, and used the African Violet potting mix again.


This guy clearly needs a new home. 


The other guys are still working on it (the fuller one shown above is in the bottom right in this picture). 


I now have one plant that has been repotted into a larger pot, and three plants that are still growing. You'll notice in the photos that the original leaf dies in many cases. For one of my plants, the leaf actually died before the new leaf pushed through the soil, and I almost dumped it out as a failed attempt! However, I was too slow to get around to cleaning up the "dead" plant and the next thing I new there was a new leaf. Like I said, keep waiting! I am hoping that these continue to grow and that eventually I will have four healthy plant cast offs! I'm pretty excited that I was able to keep these alive for so long and salvage a plant that I had otherwise thought was a lost cause. Perhaps there is hope for me and gardening yet!

The newly potted plant cluster. A much better fit! 


The African Violet potting soil that I used, purchased from Home Depot. 


If I ever see a flower one of these guys, I'll be sure to share again! I'm keeping my fingers crossed. At this point, I honestly don't even remember what color flowers this African Violet produced... Does anyone have any great gardening or African Violet advice to share with me? Has anyone rooted a plant using a different technique?